Emergencies are unpredictable and can be daunting, but being prepared can significantly mitigate the stress and potential harm they may cause. Crafting your own emergency equipment not only equips you with the necessary tools but also imbues a sense of self-reliance and readiness. This post highlights some DIY projects to help you assemble essential emergency equipment, from water filtration systems to portable cooking stoves. These projects are designed to be accessible, cost-effective, and empowering, ensuring you and your loved ones remain safe and prepared for unexpected situations.
Contents
Water Filtration System
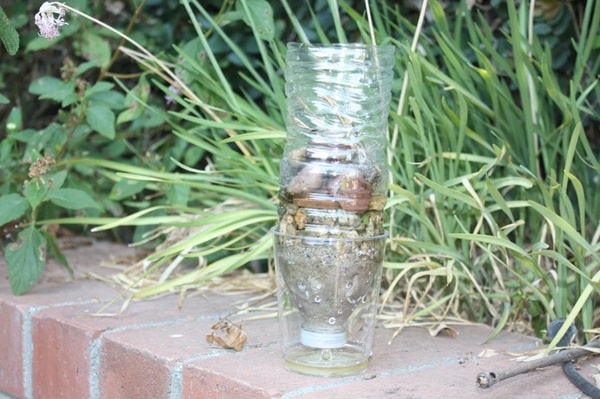
To construct a basic water filtration system, begin with gathering a plastic bottle, cotton or cloth strips, charcoal, sand, and gravel. Cut the bottom off the bottle, flip it upside down (cap side down), and layer it with cotton at the narrow end to prevent the subsequent layers from slipping through. Add activated charcoal as the next layer to remove odors and impurities. Follow this with a layer of sand, which acts as a fine filter, catching smaller particles that the charcoal doesn’t.
Finally, add a layer of gravel at the top, which filters out larger debris. Place this contraption over a clean container, pour water into the top gravel layer, and let it drip through to collect filtered water. For enhanced purification, boil the filtered water or use purification tablets before drinking. The charcoal layer might need to be replaced after several uses, while the sand and gravel can be rinsed and reused. This simple filtration system is effective for emergency situations, providing a method to make water safer for consumption.
Solar-Powered Charger
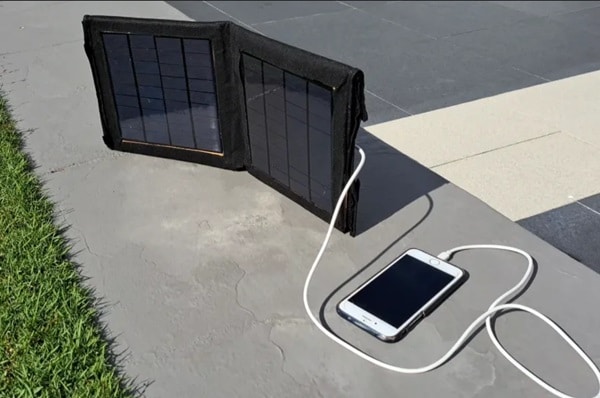
Building a solar-powered charger involves assembling a few key components: solar panels, a charge controller, batteries for storage, and connectors. Start by connecting your solar panels to the charge controller, ensuring that you’re able to regulate the energy flow and prevent battery overcharging. From the charge controller, connect the system to the batteries, which will store the electricity generated by the solar panels. Finally, attach a USB or car charger adapter to the batteries, which will serve as the output for your electronic devices.
The size and number of solar panels you choose will dictate the charging capacity of your system. For a basic DIY project, small, portable solar panels are sufficient to charge phones or small USB devices. Secure the panels in a sunny spot, connect all components using proper wiring, and you’ll have a functional solar-powered charger. This setup is invaluable during power outages, allowing you to keep essential devices charged without relying on the grid.
Emergency Candle Heater
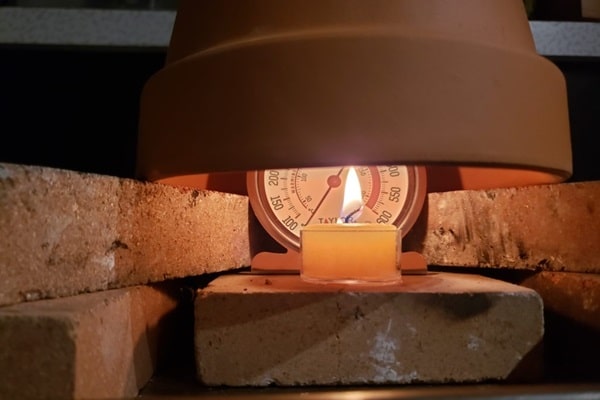
An emergency candle heater can be made using terracotta pots, a metal tray, and tea light candles. Place the metal tray on a stable, non-flammable surface and arrange the tea light candles on the tray. Light the candles and cover them with a small terracotta pot, ensuring the hole at the top is covered with a metal washer to retain heat. Invert a larger terracotta pot over the smaller one, creating a cavity where heat can accumulate and radiate out. The pots act as a heat sink, absorbing the candle’s warmth and then slowly releasing it into the room.
This heater is surprisingly effective at warming a small space and provides a source of light as well. Be mindful of ventilation in the room to avoid any build-up of carbon monoxide. Also, never leave the candle heater unattended, and keep it out of reach of children and pets. This DIY project is not only practical but also demonstrates the ingenuity behind using simple objects to create warmth.
First-Aid Kit
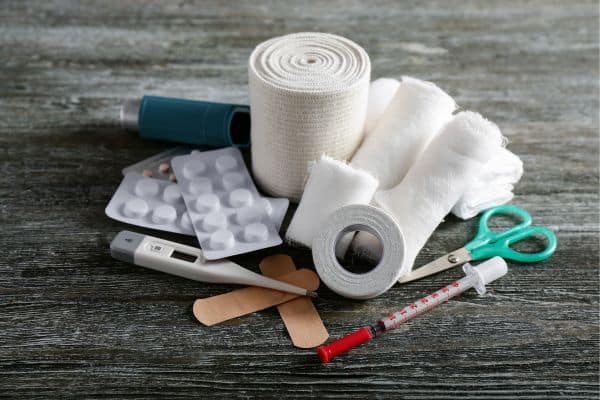
Assembling a DIY first-aid kit involves selecting a durable, waterproof container and filling it with essential medical supplies. Start with the basics: adhesive bandages of various sizes, gauze pads, adhesive tape, scissors, tweezers, antiseptic wipes, and antibiotic ointment. Consider adding gloves, a thermometer, a CPR mask, and a first-aid manual for guidance on how to handle different emergencies. Personalize your kit by including medications specific to your family’s needs, such as prescription medications, pain relievers, antihistamines, and any other over-the-counter drugs deemed necessary.
Beyond the essentials, think about including items like a flashlight, extra batteries, a whistle, and emergency blankets. These can be crucial in situations where medical help is delayed. Regularly check your kit for expired items and replace them as needed. A well-prepared first-aid kit is your first line of defense in managing minor injuries and can make a significant difference in emergency situations, providing you with the tools to act quickly and effectively.
Portable Cooking Stove
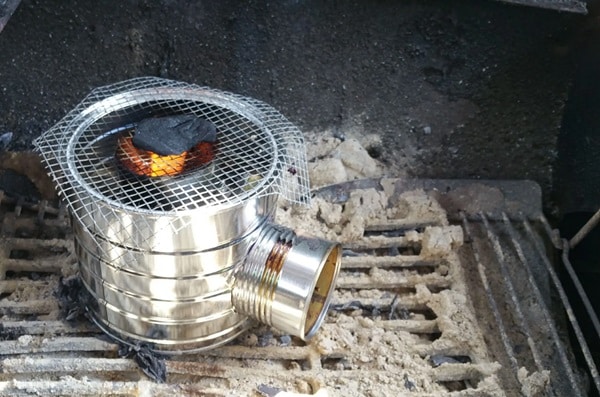
To make a portable cooking stove, you’ll need a small tin can, a larger tin can, alcohol fuel, and a fiberglass wick. Begin by cutting the smaller tin can to fit inside the larger one, leaving space at the bottom for the wick and fuel. Drill holes around the top of the larger can for ventilation. Place the fiberglass wick around the smaller can, then insert it into the larger can. Fill the space between the cans with alcohol fuel, which will be absorbed by the wick.
When you light the wick, the flame will be contained, creating a stable cooking surface on top of the larger can. This stove is ideal for heating small amounts of food or boiling water. It’s lightweight, compact, and uses fuel that’s easy to find, making it perfect for emergency situations or temporary outdoor cooking. Always use this stove in a well-ventilated area and ensure it’s properly extinguished after use. The simplicity and effectiveness of this DIY stove make it a valuable addition to any emergency kit.
Rainwater Harvesting System

Constructing a basic rainwater harvesting system requires a collection surface, such as a roof, gutters, a storage tank, and a filtration system. Start by attaching gutters to the edge of your roof to direct rainwater into a downspout that leads to your storage tank. Ensure your storage tank is covered to prevent debris and insects from entering. For basic filtration, install a mesh filter at the top of the downspout to catch leaves and larger debris before the water enters the tank.
To make the collected rainwater safe for household use, consider adding a more advanced filtration system, purifying the water with tablets, or boiling it before use. Regular maintenance of the gutters and tank is necessary to keep the system functioning properly. This DIY rainwater harvesting system can provide a supplementary water supply for gardening, cleaning, and, with proper treatment, drinking. It’s an environmentally friendly project that conserves water and can be invaluable in emergency situations where water access is limited.
Emergency Signal Devices: LED Flasher and Sound Beacon

Creating an LED flasher and sound beacon is an effective way to signal for help in emergencies, especially during nighttime or in low-visibility conditions. For the LED flasher, you’ll need LEDs, a small circuit board, a battery holder, and batteries. Start by soldering the LEDs to the circuit board in a configuration that maximizes visibility. Connect the circuit to the battery holder and ensure it’s equipped with a switch to conserve battery life when not in use. This device can flash bright light, making it visible from a distance.
For the sound beacon, assemble a simple circuit with a buzzer, batteries, and a switch. The buzzer should be loud enough to be heard from afar. Incorporate the switch into the circuit to activate the buzzer when needed. This beacon can emit a loud, continuous sound, drawing attention to your location. Both the LED flasher and sound beacon are compact and can be easily added to any emergency kit. They are particularly useful in situations where visibility is crucial for rescue efforts.
Build Resilience With DIY Skills
Embracing the DIY approach to emergency preparedness equips you with invaluable skills and tools, ensuring you’re ready to face unexpected challenges head-on. By crafting your own water filters, solar chargers, and signal devices, you’re taking crucial steps toward self-reliance and safety. These projects not only enhance your preparedness but also empower you to protect yourself and your loved ones in times of need. Take action today and start building your emergency toolkit—one project at a time.